
Have you ever stepped on a squishy floorboard outside your shower? That sinking feeling usually means water is already rotting your subfloor. Unchecked moisture quietly ruins floor joists, rots studs, and triggers toxic rot. In fact, most household floods start with tiny everyday installation errors. Catching common bathroom plumbing missteps early protects your walls, floors, and wallet from catastrophic structural decay.
Water acts like a persistent intruder in your home. It relentlessly searches for every tiny gap or pinhole opening. It seeps deep behind every loose fixture without making any noise. Homeowners often ignore tiny drops until ceilings start sagging. Let us walk through the critical errors, warning signs, and reliable fixes.
1. Overtightening Supply Lines and Fixture Connections
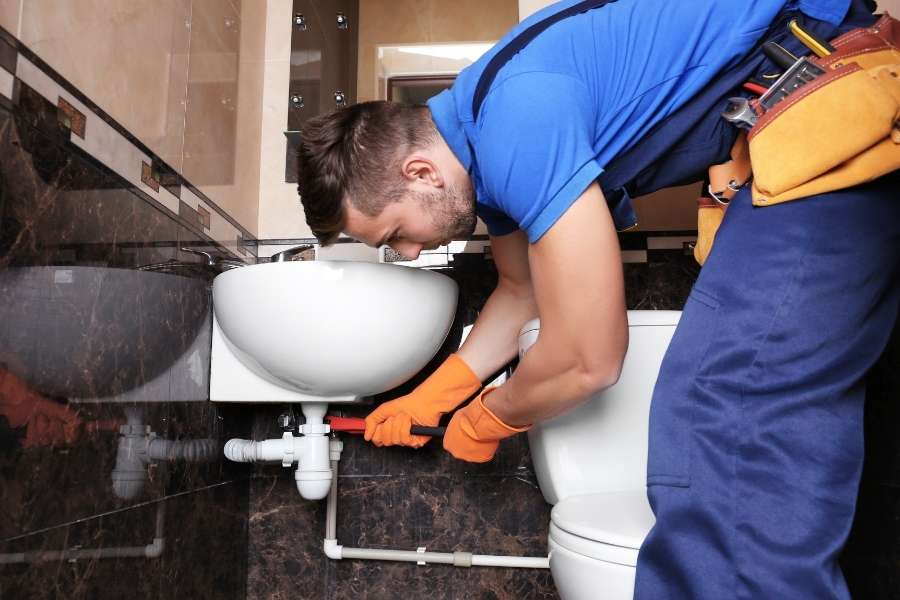
When handling metal wrenches, many homeowners assume tighter always means better. Turning threaded fittings with excessive force actually destroys the watertight seal. Plastic nuts split open, threads strip, and rubber washers get crushed flat. Plumbing parts need precise tension, not brute force from heavy tools. Homeowners attempting to fix a running toilet and stop wasting water often over-torque supply nuts and crack delicate valve bodies. Crushed internal gaskets quickly lose their natural elasticity over time. They can no longer adapt to sudden household water pressure surges. Hairline fractures develop across fittings and burst without any warning.
A deformed fitting inevitably leaks when water pipes cool down. Metal expands and contracts every single day with normal water use. Overtightening eliminates the natural mechanical clearance needed for these thermal cycles. Water escapes slowly, puddling beneath vanity cabinets and flooring unnoticed. By the time drips appear below, severe structural damage has already occurred.
The Mechanics of Compression Fitting Failures
PEX lines and flexible stainless steel hoses rely on soft internal seats. Modern toilet fill valves use molded plastic threads to receive supply lines. These thin plastic threads easily snap if you torque them too hard.
Brass compression ferrules also deform soft copper pipes when over-cranked. The cutting edge creates an internal groove that permanently ruins the line. Always follow official plumbing codes by keeping threaded connections hand-tight first. Finish with a gentle wrench turn to secure the mechanical seal safely.
- Thread every nut completely by hand to prevent cross-threading.
- Turn the nut one quarter turn past hand-tight with a wrench.
- Never add Teflon tape to compression threads with rubber washers.
- Inspect internal rubber washers to verify they sit completely flat.
If a new braided hose weeps water, step back immediately. Do not crank the brass nut down with extra force. Unscrew the fitting entirely to check the internal rubber washer. Reseat the rubber washer and tighten the connection gently again.
2. Neglecting Cracked Grout and Failed Perimeter Seals
Many people think decorative wall surfaces are completely waterproof shields. Ceramic tile resists surface water, but standard cementitious grout is naturally porous. Grout absorbs moisture and lets water pass through over extended periods. You should adopt essential plumbing maintenance tips to prevent problems before hidden wall rot starts destroying your framing. Tiny hairline cracks along wet corners invite serious hidden rot behind walls. Moisture creeps into backer boards, framing studs, and wooden subfloors continuously. Learning how to prevent water damage behind bathroom tiles saves thousands in restoration costs.
Homes settle and shift naturally with temperature changes throughout the year. Rigid grout cannot handle mechanical movement along corners and floor edges. It breaks apart, opening direct paths for hidden water intrusion. Hidden rot spreads rapidly through dark cavities, feeding toxic mold colonies. Keeping flexible seals fresh prevents water from reaching sensitive structural materials.
Mastering Perimeter Protection and Flexible Caulk
When two perpendicular walls meet, the structural joint moves constantly. Standard grout always cracks under this ongoing architectural movement. Waterproof silicone caulk must be used along these dynamic interior seams.
Homeowners frequently ask how often should you recaulk a bathtub safely. You should inspect joints every six months and replace old caulk every two years. Peeling edges and dark spots mean moisture is entering your walls. Water seeps into wall cavities, causing deep structural timber decay.
- Scrape away all degraded sealant using a plastic razor tool.
- Clean the open joint with isopropyl alcohol to kill spores.
- Let the gap dry completely before applying any new bead.
- Choose 100% silicone sealant containing active mildewcides for wet areas.
- Fill the tub with water before caulking to stretch the joint.
Emptying the bath after the silicone cures prevents bead tearing. The flexible bead flexes naturally under real mechanical loads without breaking. This simple step keeps shower water completely isolated inside the bathing area. You avoid ruined drywall and rotted framing studs behind the enclosure.
3. Ignoring Hidden Traps and Slow Under-Sink Weeps
Vanity cabinets hide drain traps and braided supply hoses from view. People store cleaners, towels, and toilet paper rolls inside these dark spaces. Because bulky items block the view, small leaks drip quietly for months. A tiny drop falling every twenty seconds wastes gallons each week. That steady moisture rots wood cabinets, delaminates subfloors, and damages ceilings below. Detecting a hidden leak early keeps wood cabinets solid and dry.
Moisture pools quietly beneath stacked cleaning products on shelf bottoms. You might never notice the standing pool until the cabinet floor collapses. Damp wood provides ideal breeding grounds for insidious mold growth. The fungal spores multiply rapidly, spreading musty odors throughout your living spaces. Regular visual checks under bright lighting stop costly wood decay early.
Identifying Subtle Diagnostic Warnings Early
Catching a weeping slip joint takes only a few minutes. Quick fixes turn major structural reconstructions into cheap washer replacements. You just need to spot the early warning clues on pipe fittings.
Learning the signs of a slow leak under the bathroom sink is essential. Clearing out the cabinet every month keeps drainage components clearly visible. Running dry paper towels along joints reveals microscopic water drops quickly. Identifying moisture early keeps repair costs small and entirely manageable.
- Sniff for sour, musty smells when opening vanity cabinet doors.
- Check for bubbling, warped, or swelling wood along cabinet floors.
- Look for green patina or crusty mineral buildup on brass valves.
- Feel for dampness along drain slip nuts and shut-off handles.
Keep a dry paper towel pressed against fittings for ten seconds. If the paper darkens, you have found an active slow weep. Tighten the slip nut slightly or replace the aged rubber washer. Always inspect the shut-off valve stems for tiny beads of water.
4. Careless DIY Pipe Modifications and Trap Geometry
Upgrading a bathroom vanity without calling a professional plumber brings great satisfaction. However, household drainage relies strictly on atmospheric venting and continuous gravity flow. Changing pipe angles without knowing drainage codes creates huge hidden hazards. DIYers often build unvented S-traps that pull standing water away quickly. Without a water barrier, toxic sewer gases freely enter your living space. Badly angled pipes also slow drainage and cause heavy recurring clogs.
Proper plumbing geometry protects human health and structural integrity alike. Air must circulate freely inside drain lines to equalize water pressure. Cutting corners on basic venting produces slow drains and constant gurgling sounds. Waste lines back up easily, threatening a hazardous drain overflow event. Such accidents flood finished floors and soak through porous structural materials.
Avoiding Hazardous Drain Configurations
Review common DIY plumbing mistakes to avoid before cutting any pipes. Traps must connect smoothly into vented wall lines without sharp vertical drops. Proper venting stops the suction that empties water from curved trap bends.
An S-trap drops vertically straight down into the subfloor. This rapid drop creates a continuous siphon that empties the trap bowl. Sewer smells, bacteria, and insects quickly enter through dried trap seals. Maintaining proper horizontal drainage slope prevents these severe sanitary failures completely.
- Maintain a steady slope of one-quarter inch per linear foot.
- Never install vertical drops immediately after the P-trap exit.
- Install an approved air admittance valve if wall venting is inaccessible.
- Never connect bare copper pipes directly to galvanized iron drains.
Direct contact between dissimilar metals triggers aggressive galvanic corrosion. The electrical reaction dissolves pipe threads and thins metal walls rapidly. Use dielectric unions to join different metals and stop disastrous sudden breaks. Proper pipe materials guarantee your drainage system remains secure for decades.
5. Over-Reliance on Caustic Chemical Drain Cleaners
Slow shower and sink drains frustrate homeowners every single day. Most people grab harsh chemical drain cleaners to dissolve hair clogs quickly. These caustic cleaners trigger intense heat through violent chemical reactions. Dumping boiling acid down a drain is extremely dangerous for domestic pipes. The intense heat softens thin PVC lines and warps rubber gaskets. Harsh chemicals eat away at pipe walls, creating major pinhole breaks.
These harsh chemical products rarely clear stubborn deep clogs completely. Instead, they pool inside the trap and dissolve essential watertight seals. Using safer mechanical methods protects pipe walls and keeps joints intact. Preserving your common bathroom plumbing drainage network requires gentle, physical clearing methods. Chemical burns and melting plastic pipes generate massive plumbing restoration bills.
The Thermal and Chemical Degradation of Modern Lines
Chemical dissolvers produce severe thermal spikes inside confined drain lines. Thin plastic pipes warp, droop, and pull apart at glued joints. Rubber slip washers soften, crack, and let wastewater drip into subflooring.
Caustic chemicals also strip away protective oxide layers inside cast-iron lines. This speeds up structural corrosion and causes rusty pipes to fail early. Mechanical tools clear clogs effectively without damaging expensive household drainage systems. You eliminate stubborn clogs without exposing your pipes to boiling acid.
- Insert a plastic hair snare into drains to remove hair mats.
- Use monthly biological enzyme treatments to digest soap fats safely.
- Unscrew the curved sink P-trap by hand to clear deep blocks.
- Use a handheld drain auger to break up tough blockages mechanically.
Physical removal clears drain pipes without producing dangerous pipe-warping heat. You avoid breathing toxic fumes while protecting delicate trap seals. Your drain lines will last decades longer with routine mechanical care. Clean pipes drain freely, preventing wastewater backups and messy surface spills.
Critical Warning Signs of Structural Moisture Infiltration
Water follows gravity along hidden wooden floor joists for long distances. A ceiling stain rarely sits directly below the leaking pipe fitting. You must track moisture trails back to the true origin carefully. Check hidden areas regularly to catch dampness before fungal colonies bloom wildly. Early detection keeps simple repairs from turning into massive home insurance claims. Inspect your home immediately if you observe unusual moisture symptoms anywhere.
Soft, springy floorboards surrounding toilets, showers, and vanity bases demand fast action. Water from a failed wax ring rots plywood subfloors from beneath. Blistering paint, peeling wallpaper, or swelling baseboards in adjacent rooms indicate moisture migration. Brown, circular water stains forming on ceilings below upstairs bathrooms require immediate attention. Damp, earthy smells that linger even after scrubbing point to hidden leaks. Sudden spikes in monthly water bills suggest pressurized pipes are leaking constantly.
Proactive Maintenance Schedule for a Resilient Home
Preventing catastrophic water destruction does not require difficult daily labor. It simply takes a brief, routine quarterly inspection of critical fittings. Resilient homes stay dry because owners inspect plumbing before components fail completely. Take fifteen minutes every few months to check all your pipe fittings. Look under sinks, feel caulk seams, and test every shut-off valve carefully. Catching tiny drips early keeps structural framing solid and completely dry.
Every month, clear mechanical drain stoppers and remove trapped hair from screens. Clean out sink overflow openings so basin water drains away safely during clogs. Every three months, inspect vanity cabinets, braided hoses, and shut-off valves for moisture. Look closely for white crusty mineral deposits around valve stems and compression nuts.
Every six months, inspect perimeter caulk along tubs, shower bases, and tiled walls. Replace cracked sealant immediately to keep water from penetrating wall cavities and subfloors. Every year, inspect toilet stability, closet bolts, and internal tank flappers thoroughly. Solid, stable fixtures prevent broken seals and stop silent water waste permanently.
Frequently Asked Questions
How can I tell if water is leaking behind my shower wall without cutting the drywall?
Check for hollow-sounding tiles, loose fixtures, cracked grout seams, or persistent musty smells. You can also press a pinless moisture meter against drywall in adjacent rooms. This diagnostic tool detects elevated moisture behind walls without damaging paint or plaster.
Why does my toilet rock slightly on the floor, and is that considered an emergency?
A rocking toilet is an urgent issue because movement breaks the soft wax seal underneath. Flawed wax seals let dirty toilet water soak subfloors with every single flush. You must remove the toilet, fit a new seal, and shim the base securely.
Are stainless steel braided supply lines truly immune to bursting?
Braided stainless steel hoses are very durable, but they are not indestructible over time. The internal rubber hose degrades from harsh water minerals and continuous household pressure. Plumbers recommend replacing all flexible supply lines every five years to avoid sudden bursts.