
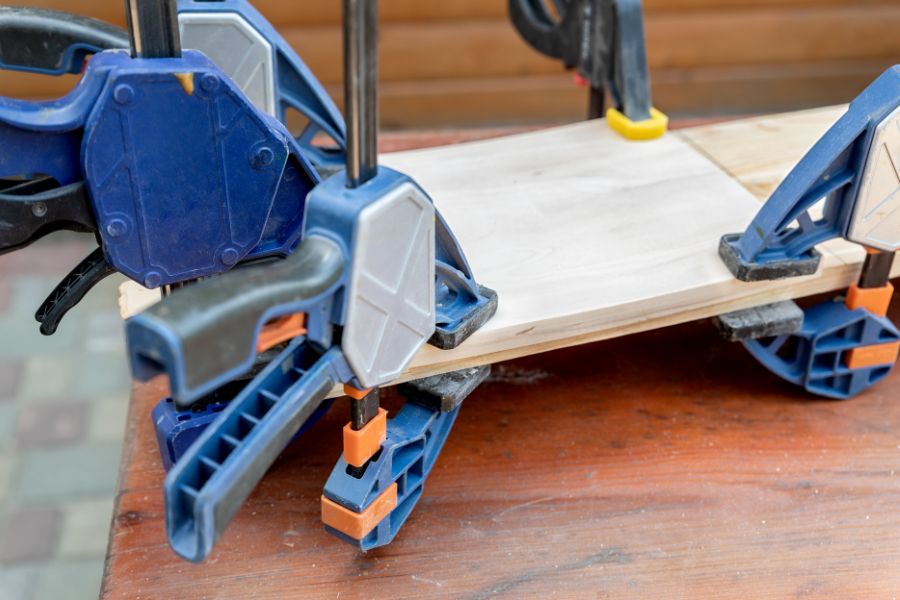
Have you ever ruined a beautiful wood project during assembly? It is a very frustrating and common workshop experience. Securing your pieces properly is absolutely vital for project success. Clamps are your best friends in the busy shop. They hold everything tightly together while the adhesive cures fully. You need to understand your tools completely for total success. This practical guide will transform your daily woodworking approach completely. Knowing exactly how to select and use clamps effectively for glue ups is fundamental.
Building a Versatile Arsenal of Clamps
Every woodworker needs a solid collection of holding tools. A single type will never cover all your daily needs. You must adapt to the specific project at hand. Let us explore the best types of woodworking clamps for panel glue ups. Your choices will directly dictate your overall assembly success. Poor glue control can easily ruin your final finish later. You might face blotchy wood finishing issues if you ignore this. Proper holding power prevents messy squeeze-out from damaging surrounding pores. Having the right tools makes the entire process incredibly smooth.
Harnessing Power with pipe clamps
These are the true heavy workhorses of any shop. You attach cast iron fixture heads to metal plumbing pipes. This system allows you to create custom lengths easily. Do you need a much longer holding tool today? Just buy a longer piece of threaded steel pipe. They offer incredible physical strength for very little money.
You can apply massive physical force to thick lumber. Always keep several of these nearby for large projects. They are slightly heavy but very easy to operate. Protect the wood surfaces from the hard metal jaws. Use small wooden blocks to prevent ugly surface dents. Clamps like these handle heavy dining tables with pure ease.
Investing in these tools will save you much frustration. You will never regret having extra pipes in corners. They are virtually indestructible under normal daily shop conditions. Plumbers use these same pipes for high pressure water. That proves just how strong they really are today. They will serve your shop for many long decades.
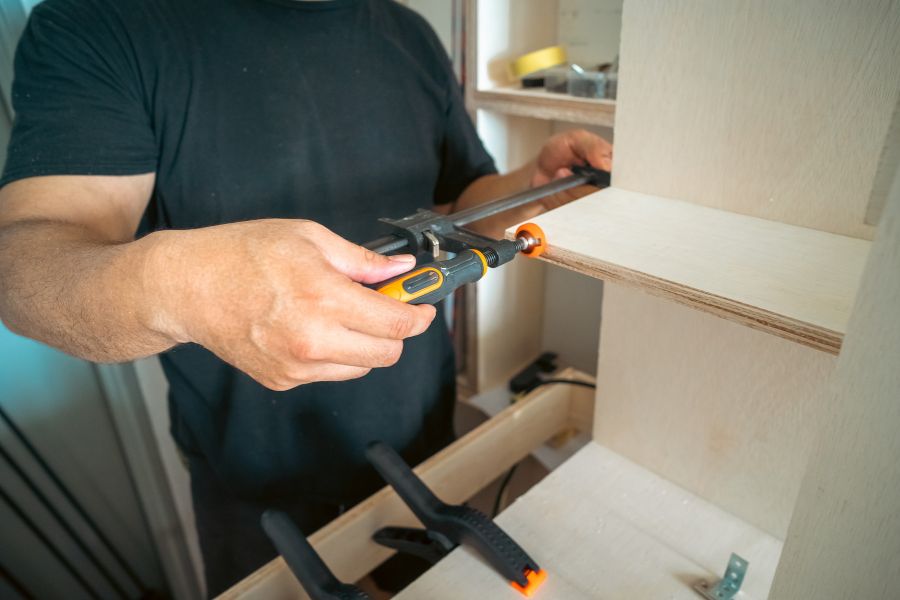
The Precision of parallel clamps
These tools represent a major upgrade for serious builders. Their large rectangular jaws remain perfectly straight under tension. This incredible feature prevents your expensive wood from twisting. They distribute force evenly across the entire joint line. Even pressure always creates the strongest possible adhesive bond.
They are heavy but absolutely worth the financial investment. These specific clamps are total game-changers for fine cabinetry. They sit flat on your workbench during the process. This keeps your project stable while you tighten things. They are the ultimate tools for achieving flat surface results.
You can trust them for your most critical work. They will never let your glued boards slip sideways. Many professionals consider them the absolute gold standard today. You should buy them in matching pairs for perfect balance. They will last a lifetime if treated with total respect.
Grabbing Quickly with spring clamps
Sometimes you just need a fast and temporary hold. spring clamps act exactly like giant and powerful clothespins. You can operate them easily with just one single hand. They are perfect for holding small decorative trim pieces. I use them frequently to secure custom cutting templates.
They will never provide structural or crushing holding force. However they are vital for keeping your momentum going. Keep a bucket of them near your main workbench. They grab delicate parts gently without causing surface damage. You will reach for these small tools constantly every day.
They are very cheap to buy in large quantities. You can never have too many of these around. They are perfect for quick repairs on small items. Their rubber tips protect delicate painted surfaces very well. Every shop needs a large drawer fully dedicated to them.
The Science Behind Proper clamping pressure
Applying the correct force is a very delicate balance. Too little force creates weak and easily broken joints. Too much force squeezes out all the required adhesive. You must find the perfect middle ground every single time. Precision is absolutely vital for any successful wood project. The difference between a joiner and a carpenter often involves this specific precision. A skilled joiner understands exactly how much force is required. Let us look closely at the hidden details of compression.
Finding the Right Balance
A good joint needs intimate wood fiber contact. You should see a tiny and consistent adhesive bead. This small squeeze-out indicates a healthy and strong bond. Starved joints happen when you tighten things excessively. The wood absorbs some liquid but the rest escapes.
You want the glue to stay inside the seam. Always aim for firm but not crushing tension. Listen closely to the wood while you turn handles. If the fibers crack loudly you are pushing too hard. Back off the pressure slightly to protect the delicate joint.
Understanding this balance takes time and much patient practice. You will learn the exact feeling in your hands. Do not rely entirely on visual cues alone. The resistance of the tool handle tells a clear story. Pay close attention to what the wood is doing.
how much clamping pressure is needed for wood glue?
The exact answer depends heavily on your chosen material. how much clamping pressure is needed for wood glue? Softwoods like pine need about one hundred fifty pounds. Hardwoods like oak require up to three hundred pounds. This ensures dense fibers press together very tightly.
Clamps must do a lot of heavy lifting here. Spacing your tools evenly is a very smart strategy. Place them every six inches along the seam. This prevents uneven gaps from forming between your boards. It guarantees consistent contact across the entire glued surface.
Proper spacing is the secret to professional shop results. Alternating your tools top and bottom is also wise. This evens out the physical forces acting on boards. It stops the entire panel from bowing into an arch. Geometry is your best friend during this critical phase.
Ensuring Perfectly Flat and Square Results
Wet adhesive acts exactly like a slippery liquid lubricant. Your boards will naturally try to slide around everywhere. This shifting ruins panels and distorts square cabinet boxes. We must use smart techniques to lock things down. Proper preparation always guarantees a beautiful final product. You need to master these geometric concepts completely today.
avoiding bowed panels with proper clamping cauls
Flat tabletops require pressure from multiple different directions. avoiding bowed panels with proper clamping cauls is essential. Cauls are thick and straight scrap boards placed vertically. You sandwich your project between these rigid support pieces. This physical barrier stops the wood from bending upward.
Proper caul placement traps the wood in a flat plane. Apply smooth packing tape to them before use. This prevents accidental gluing to your actual project boards. This simple trick saves countless hours of painful sanding. Your clamps press the cauls down tightly first.
You must prepare these cauls before the glue bottle opens. Make them slightly curved to apply pressure in the center. This slight curve is called a camber in woodworking. It guarantees the middle of the panel stays perfectly flat. Mastering this trick changes everything for your furniture building.
Achieving Flawless square alignment
Building boxes requires perfect ninety-degree corners every time. You must measure very carefully during the assembly process. Check your square alignment by measuring opposite diagonal corners. If the two numbers match exactly you are good. A tape measure never lies about your corner angles.
If they differ adjust the angles of your tools. Gently pull the longer diagonal into correct dimensional alignment. Do this quickly before the adhesive begins to set. Checking for squareness takes only ten simple seconds. Those ten seconds prevent major hardware installation headaches later.
You can also use precision square blocks in corners. Clamp these blocks directly inside the cabinet interior. They force the walls into a perfect perpendicular relationship. This is incredibly helpful for building large kitchen cabinets. Never assume your box is square without checking it.
Managing Your Workshop Assembly Clock
Time moves incredibly fast when adhesive is finally exposed. You cannot rush but you cannot delay either. Understanding chemical curing times reduces your daily assembly anxiety. A calm approach prevents silly and costly mistakes. We will outline a solid timing strategy right below. Proper planning makes every glue up completely stress free.
Maximizing Your open time
open time is your active and safe working window. It starts exactly when adhesive touches the wood surface. Standard glues give you about ten minutes to work. This is plenty of time for a picture frame. Ten minutes is rarely enough for complex furniture builds.
Consider using an extended release liquid hide adhesive instead. It gives you thirty minutes of relaxed working time. A dry run without glue is always strictly mandatory. Keep your clamps fully open and ready for action. Being prepared is the best way to beat time.
Organize your workspace to eliminate any unnecessary walking around. Put your wet rag right next to your project. Have your mallet ready for tapping stubborn wooden joints. Efficiency is the key to managing this stressful phase. Everything must be within arm reach at all times.
Smart Methods for glue cleanup
Dried adhesive ruins wood stains and finishes completely. Efficient glue cleanup is mandatory for professional results. Do not wipe wet glue with a damp rag. This pushes the sticky mess deep into wood pores. Wait thirty minutes until it feels like soft rubber.
Then simply slice it off with a sharp chisel. This leaves the surrounding wood surface perfectly clean. Alternatively use painter tape along the joint lines beforehand. Peel the tape away to remove all wet squeeze-out. Clamps can get messy so protect them too.
You can also use a specialized silicone brush. This spreads the liquid perfectly without making a mess. It limits the amount of squeeze out you get. Less mess means less cleanup time later on. Good habits create beautiful and flawless wooden surfaces eventually.
Preparing Surfaces for the Perfect Bond
Your holding tools can only do half of the job. The wood surfaces must be prepared perfectly beforehand. Smooth and straight edges guarantee a nearly invisible seam. Let us dive into proper shop milling techniques now. Good preparation makes the entire gluing process much smoother. You cannot skip these vital preparatory steps ever.
The Importance of Proper Milling
Rough lumber will never glue together properly or safely. You must run boards through a jointer machine first. This creates a perfectly flat and ninety-degree reference edge. Next use a sharp table saw for parallel cuts. A clean cut requires less force to push together.
Freshly cut edges bond much better than old ones. Wood fibers oxidize and close up over passing time. Always glue your pieces shortly after cutting them flat. This ensures the adhesive penetrates the fibers deeply. Clamps hold them while the chemical bond develops fully.
Check your edges with a reliable straight edge ruler. Even a tiny gap can compromise the whole joint. A hand plane can remove small high spots easily. Taking thin shavings creates a beautiful and perfect fit. This attention to detail defines a true master craftsman.
Dealing with Natural Grain Direction
Wood expands and contracts with seasonal air humidity changes. You must alternate growth rings when making wide panels. This minimizes the risk of severe warping later on. Mark your boards with a large white chalk triangle. This helps you keep them properly organized on tables.
Proper grain orientation complements your holding tools perfectly. It creates a stable panel that resists future cupping. Take your time to arrange the boards visually first. Choose the best looking side for the top surface. The final aesthetic relies heavily on this careful arrangement.
Pay attention to the grain direction for hand planing. You want the grain running the same way everywhere. This prevents tear out when smoothing the glued panel. Planning ahead saves you massive amounts of sanding later. Wood is a living material that requires deep understanding.
The Crucial Role of the Dry Fit
Never apply adhesive without testing the fit perfectly first. A dry run exposes hidden problems and gaps immediately. It gives you a chance to practice tool placement. Let us explore why this step is completely mandatory. Skipping it will eventually lead to a total disaster. You must practice the assembly before getting things wet.
Rehearsing the Assembly Steps
Gather every tool you will need well in advance. Place your clamps exactly where they will eventually go. Check if you have enough reach and physical clearance. Adjust jaw capacities so they are ready to grab. Doing this eliminates frantic searching later on.
It keeps your heart rate low and very steady. A calm mind produces far better woodworking results. You can identify which parts need to connect first. Write down a numbered sequence on a notepad. Follow this checklist when the glue is finally wet.
Have a helper available for very large furniture projects. Discuss the entire plan with them before starting anything. Assign them specific tasks like applying the liquid adhesive. Teamwork makes large glue ups much more enjoyable. Communication prevents costly errors during the brief open time.
Identifying Hidden Joint Gaps
During the dry fit inspect every single seam carefully. Shine a bright flashlight behind the joined wood pieces. If light shines through your joint is not tight. You must remill those edges before proceeding any further. Forcing a bad joint closed creates permanent internal stress.
The wood will eventually crack under that trapped tension. Clamps should only hold pieces not bend them violently. A perfect joint goes together with minimal hand pressure. Take the time to fix errors before applying glue. Patience pays off greatly during this critical testing phase.
Mark any problem areas with a light pencil line. This shows you exactly where to remove excess material. Test the fit again after making your small adjustments. Repeat this process until the joint is absolutely flawless. Perfection is achieved through careful and repeated tiny adjustments.
Specialized Tool Care and Maintenance
High-quality holding tools are a significant financial investment. You must protect them from rust and daily abuse. Well maintained tools function smoothly and reliably every time. Let us look at some basic upkeep routines today. A little effort greatly extends their useful shop lifespan. Clean tools are an absolute joy to use daily.
Protecting Bare Metal Surfaces
Adhesive aggressively sticks to bare steel and iron bars. You should apply a thick coat of paste wax. Rub it firmly onto the bars of your parallel clamps. Do the exact same for your iron plumbing pipes. Dried glue will easily pop off a waxed surface.
Reapply the protective wax every few months for safety. This prevents ugly rust from forming in humid environments. Smooth bars make adjusting the sliding jaws much easier. Your tools will look brand new for many years. Clean clamps are a joy to use every day.
Never use silicone based sprays on your metal tools. Silicone contaminates the wood and ruins your final finish. Stick to traditional carnauba paste wax for complete safety. It is cheap and incredibly effective for rust prevention. A quick buffing leaves a hard and protective shell.
Inspecting Jaws and Handles
Check the wooden or plastic handles for hairline cracks. Ensure the sliding metal mechanisms move without any binding. Clean the threads of the heavy screws regularly. Apply a dry Teflon lubricant to the moving parts. Never strike the tool handles with a metal hammer.
Treat your tools with genuine respect and proper care. Wipe off any dusty sawdust after finishing a project. Hang them neatly on a dedicated wall storage rack. Proper storage prevents them from falling onto concrete floors. Perfect alignment depends on straight and undamaged metal bars.
Inspect the rubber jaw pads for excessive daily wear. Replace them if they become hard or severely cracked. Soft pads protect your beautiful wood from deep dents. You can buy replacement pads very cheaply online today. Maintain your gear and it will serve you forever.
Choosing the Right Adhesive for Your Project
The type of adhesive matters just as much as tools. You must pair your clamps with the right chemical. Different woods and environments demand very specific glue formulations. Let us explore the most common options available today. Picking the wrong bottle can ruin your entire project. It is a decision that requires careful planning.
Polyvinyl Acetate and Its Common Uses
This is the standard yellow glue in most shops. It is cheap and incredibly strong for interior furniture. It requires moderate pressure from your heavy holding tools. The bond is actually stronger than the wood itself. It is not waterproof so keep it inside always.
It cleans up easily with water before it dries. You have about ten minutes of open working time. It is very reliable and consistent for daily tasks. Every beginner should start with this basic adhesive type. Buy it in small bottles to ensure absolute freshness.
Old glue loses its strength and becomes very thick. Write the purchase date on the bottle with marker. Throw it away after twelve months to be safe. Fresh glue flows smoothly and creates thin invisible seams. Your clamps will not have to work as hard.
Polyurethane and Waterproof Applications
Polyurethane glue is required for any outdoor wood furniture. It is completely waterproof and incredibly durable over time. It reacts with moisture in the wood to cure. You must lightly mist the wood with plain water. It expands as it dries so pressure is vital.
This expansion can push your careful joints completely apart. Your clamps must be extremely tight and very secure. It is very messy and stains your hands permanently. Always wear tight rubber gloves when handling this chemical. The squeeze out foams up into a hard crust.
You must cut this foam away with a chisel. It will not wash off with water at all. It requires mineral spirits for any wet chemical cleanup. Use it only when absolute water resistance is needed. It is a specialized tool for very specific jobs.
Frequently Asked Questions
What are the best types of woodworking clamps for panel glue ups? Parallel and pipe versions are the best choices available. They offer massive strength and keep boards perfectly flat. You should own at least four of these types.
Why do my boards slip when I apply pressure? Wet adhesive creates a very slippery surface between boards. Ensure your caul placement is tight before adding tension. You can also hide tiny brad nails inside joints.
Can I leave my glued project secured overnight safely? Leaving the assembly under tension overnight is very safe. It allows excess moisture to evaporate fully and evenly. This prevents the wood from shrinking unevenly the next day.
How do I clean dried adhesive off metal bars? Preventing the sticky mess is better than cleaning it. Coat your bars heavily with protective paste wax beforehand. Dried drops will pop off easily with a stiff brush.
Is it possible to use too many holding devices? You cannot really use too many on a single project. Spacing them closely distributes the physical load very evenly. Just ensure you avoid applying extreme and crushing force.
Do I need expensive brands to get good results? Expensive tools are nice but not strictly mandatory ever. Budget friendly options work perfectly if used correctly daily. Focus heavily on good technique rather than brand names.